Night and Low Light Photography
Night Photography & Exposure:
Night photography is often avoided by beginners because initial results are often not satisfactory. Night exposure can be tricky because the camera meter can only be used as a starting point. The reason for this is that the natural light and dark situations that occur in night scenes make camera meters unreliable. Exposure meters are designed to read equal amounts of light and dark areas in order to calibrate the exposure based on the gray card, (18% reflected gray), as covered in the section on “Meters”. Night scenes do not have equal amounts of light and dark, and the meter cannot calibrate the exposure properly in many situations.
You will find that the bracketing feature of your camera will be very useful in night photography. Start by setting it to 1 or 2 stop intervals, test the scene, and make adjustments to the bracketing according to your results. The wonderful thing about digital cameras is that you can see what your camera captures immediately so that you can make the proper adjustments accordingly and keep trying until you achieve the result you want.
The images below provide an example of what happens in the night scene as the shutter gets slower and allows for more light. This image was intentionally shot without a tripod to also exemplify the camera movement that occurs when the shutter is used at a slow speeds. Note how the image picks up motion blur as the shutter gets slower.
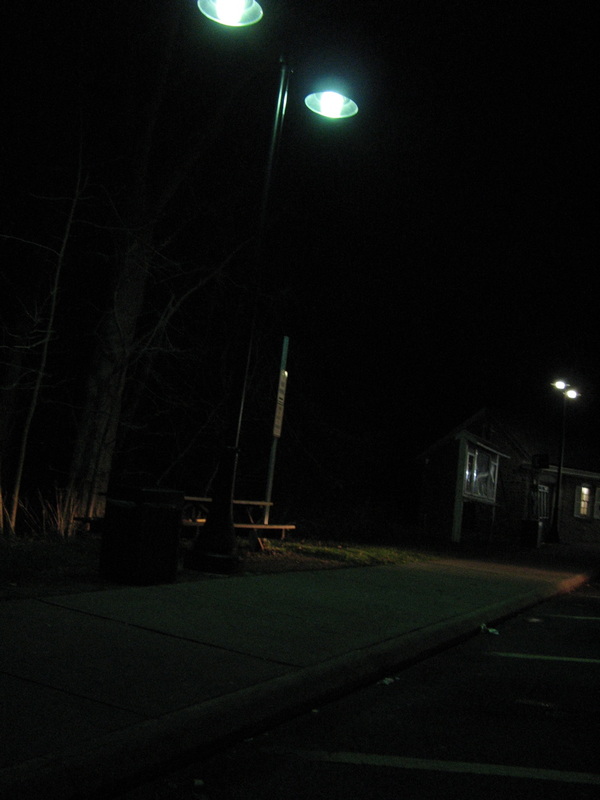
Shot at f 2.8 @ 1/15 second.
|
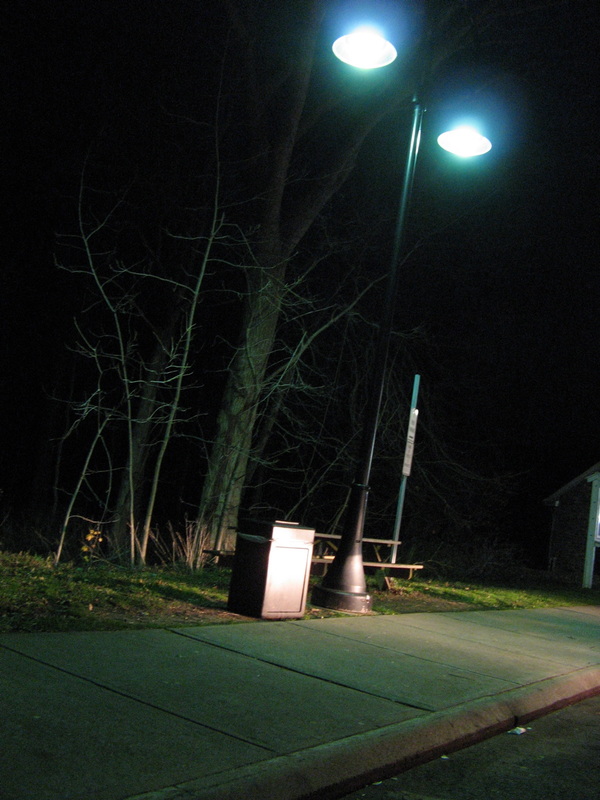
Shot at f 2.8 @ 1/4 second.
|
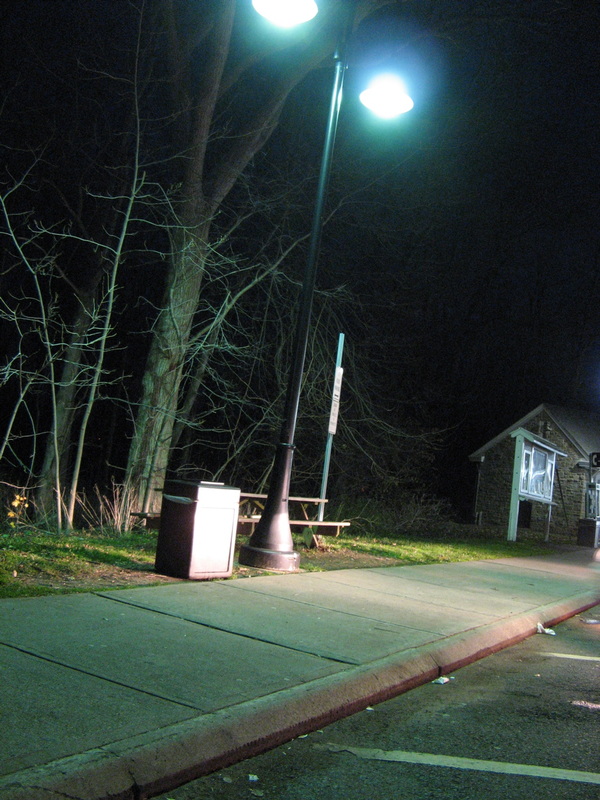
Shot at f 2.8 @ 1/2 second.
|
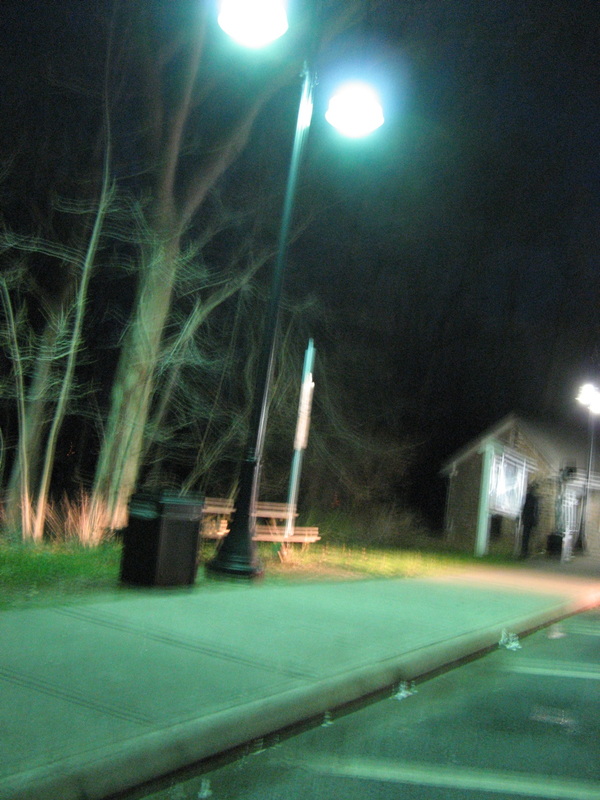
Shot at f 2.8 @ 1 second.
|
As a guideline, start with the following camera settings and work around these, bracketing by 1 and 2-stop intervals in either direction. Start with: f5.6, shutter of 1 second, ISO 400
Remember that the above suggestion is a VERY ROUGH starting point. You might find that you need a shutter of 5 seconds, or you might prefer to up your ISO to 800, or if you want very good depth of field and need to use an f stop of 11 or 16, you might find yourself exposing for 30 seconds and using the B setting of your camera. The idea is to start with a somewhat “educated” guess, and go from there.
Important Note: For most night photography to be successful, you will need a tripod. Shutter speeds of less than 1/15 will cause camera movement when the camera is hand held. Be prepared and make sure that you have a tripod before you attempt to shoot at night.
Note for film users: When shooting long exposures with film, the “reciprocity law” comes into play. Reciprocity Law is the loss in the exposure sensitivity of the film due to the prolonged exposure. Shutters longer than 1/8th of a second will be affected by reciprocity failure. As an example, a film rated with an ISO of 400 that is exposed for 2 seconds or so will actually have an ISO sensitivity of 200. Knowing this ahead of time can be very useful, especially since when we use film, we cannot see our immediate results to correct the exposure on the spot.
As a guideline, adjust your exposure as follows when using film with long exposures:
For exposures from 1-8 seconds, bracket by +1 to +1 1/2 stop.
For exposures of 9-60 seconds, bracket by +1 1/2 to +2 stops.
For exposures over 1 minute, bracket by 2 1/2 to 3 stops.
